Ok, let's try this once more... But before we get too far, let's consider the graphic below. It was found online from: http://www.wordsmithstudio.org/wp-content/uploads/2012/10/Aesthetic_Exposure_Triangle2.jpg
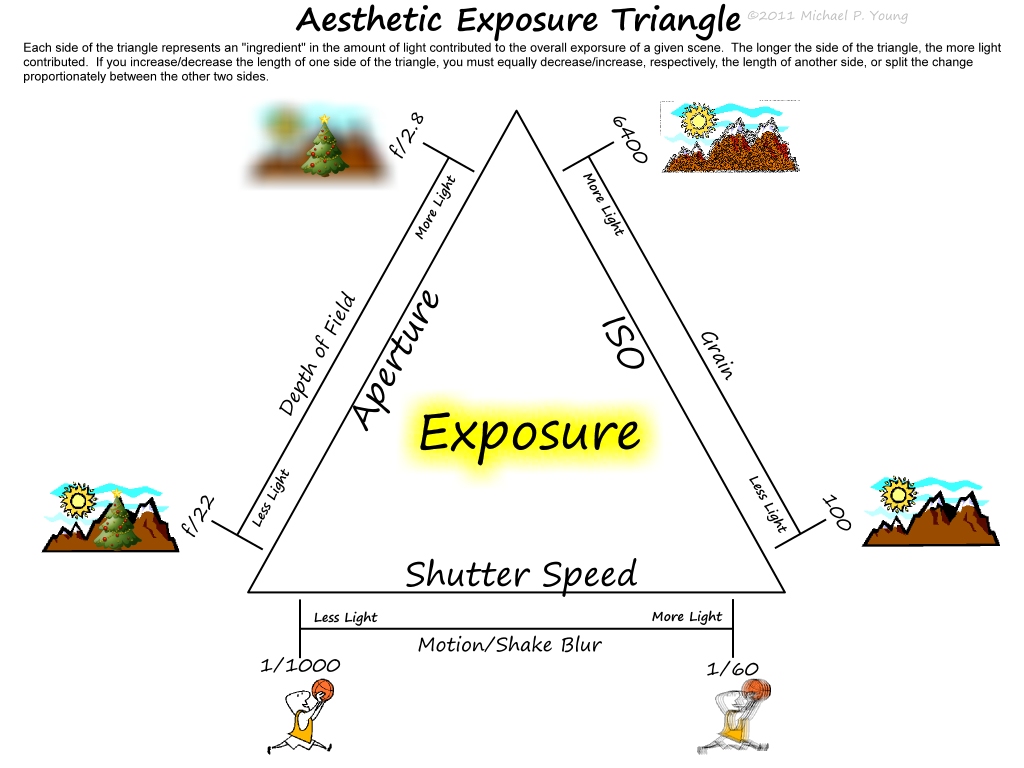
Just because your camera can go to high ISO speeds, should you use them? What is the problem with using higher ISO settings? These are some of the questions that we need to understand the answers to as we continue moving towards taking better images. Thinking about what we read, and saw yesterday, let's look at the following questions.
- What does the ISO number indicate?
- ISO numbers range on most average, and lower end digital cameras from 100-1600. The ISO range can go much higher for better quality cameras.
- In what types of situations would a lower ISO number be used for?
- In what types of situations would a higher ISO number be used for?
- What ISO setting needs more light to enter the camera to get a well exposed image: a setting of 400 or a setting of 800?
- What would be considered a “faster” film, or ISO setting: 100 or 400? Why might this be a good thing? Why might it be a bad thing?
- Think about the following lighting situations. What ISO setting might you start off with? (Adjustments may be necessary in order to get good exposure.)
- Outside on a bright day.
- Inside a gymnasium.
- In your living room, with lots of natural light coming through the windows.
- In the library.
- At the bottom of the hill, along Big Creek, on a shaded path during mid afternoon.
- In your backyard, at 9:00pm
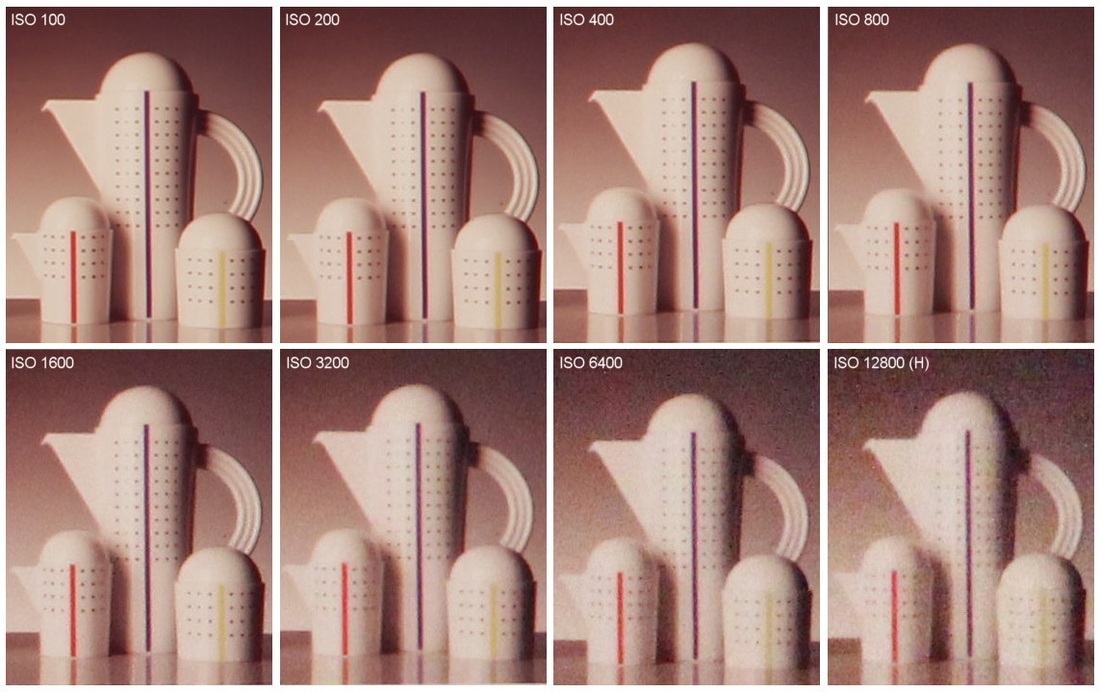
Found online at: http://www.bobatkins.com/photography/digital/rebel_t2i/t2i_noise_2.jpg
Your Task:
Today, you will explore how ISO affects your images. Set up a still life scene to shoot; I would recommend somewhere indoors with a lot of light - you don't want your flash to fire. Take your first shot on AUTO so that you can get a proper exposure, figure out what the ISO, Aperture, and Shutter speeds were for that image. Set your camera to Manual, enter the settings that the camera used to get a good exposure, take another photo at that setting. Once you've set your camera to Manual, the only option you will be changing for this task, is your ISO. Retake the image that you just took, with a different ISO setting; do this with at least 5 different ISO settings. Upload your images to your blog, indicating what the ISO settings were for each of your images.
Today, you will explore how ISO affects your images. Set up a still life scene to shoot; I would recommend somewhere indoors with a lot of light - you don't want your flash to fire. Take your first shot on AUTO so that you can get a proper exposure, figure out what the ISO, Aperture, and Shutter speeds were for that image. Set your camera to Manual, enter the settings that the camera used to get a good exposure, take another photo at that setting. Once you've set your camera to Manual, the only option you will be changing for this task, is your ISO. Retake the image that you just took, with a different ISO setting; do this with at least 5 different ISO settings. Upload your images to your blog, indicating what the ISO settings were for each of your images.
 RSS Feed